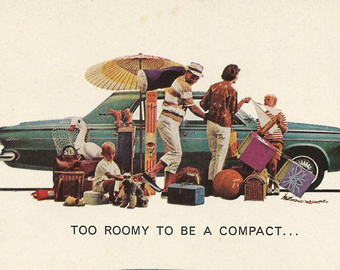
Free the Fridge: Organizing Your Fridge for Turkey Day Leftovers – Tips from a Professional Organizer

Organizing your fridge

This Saturday is “Clean Out Your Refrigerator Day”. Yes, there is a specific day devoted to rallying Americans to reach into the scary depths of their refrigerators and clear out what is old, crusty and otherwise no good.

This day comes at the perfect time as Americans are prepping for one of the biggest feasts of the year – Thanksgiving. And with any large holiday feast, there are LEFTOVERS.

Now is the time to really look at your fridge and take the time to go through and pull out expired condiments and any old science projects lurking in the back corner. It’s also a good time to give it a good scrub-a-dub. By following a few simple tips below, your fridge will be cleared out, clean and ready for those tasty Thanksgiving treats.

  • Take everything out – This might seem over the top, but until you go through the practice of removing EVERY item, you won’t really know everything that’s hiding out in your fridge. It’s amazing what can hide behind a jar of pickles!
  • Purge unused jars and condiments – I’ve said this before with clothing, and the same goes for food you don’t use. Discard opened jars of things that you know you just aren’t going to use, or don’t foresee using in the future.
  • Clean the fridge – Wash down and disinfect the inside walls of the refrigerator, the bins, the shelves, and every other cranny. Inevitably, your holiday house guests will be in and out of your fridge, so keep it clean to avoid that “oh no, the fridge is a mess” moment.
  • Wipe down everything going back in the fridge – Every condiment, container and beverage that goes back in the fridge should be disinfected and wiped down. That way you can rest assured your clean, germ-free shelves aren’t immediately being compromised.
  • Allocate a shelf for “leftovers” – Whether it’s for Thanksgiving or weekly meals, I find that it’s best to leave one shelf for leftovers only. Use masking tape to label each container with contents and a date. I even go as far as to put an expiration date based on guidelines from health professionals.

If you decide you don’t want to keep all of the leftovers on Thanksgiving Day, set up a “to go” station so guests can take the leftovers they’d like home. Hey, it will save you room in the refrigerator – and calories!

Photo: Penn Live

Time for Turkey – and De-cluttering: Dining Room Prep from a Boston Professional Organizer

Organizing dining room for holidays

Ding-dong. Grandma is at the door. With her pumpkin pie and high expectations. Okay, so perhaps we have a bit of time before the turkey makes its return, but not much. There are about three weeks until T-day. It’s time to get your dining room in order.

If you are like most of my clients, the dining room is a dumping ground for laundry, unopened mail, completed school projects, and anything else that needs to be pushed aside from the rest of the first floor rooms. It’s more of a disaster zone than a dining room. The good news is with a small chunk of time from your day – and a few tips from a professional organizer (yours truly) – you can return your feasting room to normal and have it ready for a tasty Thanksgiving dinner.

  • Carve out one hour from your day – Half the battle is taking the time to get this done. Put it on the calendar, and prepare to execute (all while knowing that it’s for the greater good of delicious food). DO NOT LEAVE THE ROOM DURING THAT HOUR, and even better, set a timer. Have your coffee nearby, put some music on, and sink your teeth in.
  • Prepare an organization path – It’s important to avoid jumping from one section of the room to the other. This is not efficient and you ultimately feel unaccomplished. Start in one corner as you enter the room and work your way around the room.
  • Create dedicated piles for items that need to be put away – A pile for each kid’s room, a pile of laundry, shoes for the mud room, etc. Remember, we’re making piles so you can put away when your hour expires.
  • Resist the Urge to Clean – Yes, this seems counterintuitive, but the goal is to focus on de-cluttering, and you can clean once the room is ready for a polish.

When the timer rings at the end of the hour, take the time to take the dedicated piles to the correct room. When you do this, your dining room will be clear and ready for the fun part – cleaning, and then seasonal and oh-so festive décor!

This “de-clutter hour” is highly effective, and you should schedule these for different rooms 1 or 2 times each week. You’ll be amazed at how much you can de-clutter each week!

Photo: Modern Vintage Coastal


A Lesson in Keeping it Simple – From a Boston Professional Organizer

organizing paperwork

Around this time of year we all start mentally stressing out with all that needs to be done. Halloween is around the corner. I’m hosting Thanksgiving…with my crazy in-laws. And then the holidays. What? The holiday? They’re already here? SIGH.

Yes, we all become a bit busier come October, but it’s important that we take a deep breath, do a couple quick yoga poses, and remember that it’s important to keep it simple amid these chaotic times.

One of the areas where this is especially true is with paperwork, which I find there is a lot more of as we approach the end of the year (and the start of the year when we start thinking about our taxes!). Here are a few easy tips to consider when looking to K.I.S.S. with paperwork. That being said, please check with your financial advisor, accountant, and/or lawyer to best determine how long you need to save your paperwork.

  1. Discard only necessary paperwork – Many times we keep around bank statements, old insurance policies, credit card statements, and investment statements when there is really no need. Once you’ve reconciled these expenses, it’s best to rid yourself and your desk of the paperwork.
  2. Keep tax records – You should keep your tax records for seven years, so be sure to keep a specific folder for these so you can easily find them in one place.
  3. File, file, file – When keeping documentation for taxes, create 4 separate file folders to represent each quarter in a calendar year. That way if you need to find a piece of paperwork, you can easily find it in the appropriate quarter.
  4. Don’t let it pile up – This is simple, but remember the motto, “File, not pile!”
  5. Go digital – These days, everything has a paperless version. Simply sign up for paperless bills or statements, or opt to pay bills online, to cut down on unnecessary paper clutter.
  6. Create an “In, Out, Read” File System – We all have so much incoming mail, outgoing bills, and other stuff that needs our attention. Instead of leaving it in a stack on the counter, clearly organize with easy call to action labels. That way you have a constant reminder what you need to sort through!

Consumer Reports recently did a deep dive into this very topic, and I encourage you to take a peek. Hey, a little less paperwork on our desks couldn’t hurt!

Photo: Peltier Interiors

Tip Tuesday – Easy Steps to Organize a Kids Playroom

Organizing Kids playroom


Organizing a playroom sounds oxymoronic. If a playroom is “organized” then can the kids actually “play”? The answer is yes! With a few simple steps – and organizing materials – you can turn your kids’ playroom into a functional – and fun! – space. I pride myself in putting the “fun” in functional! J Follow these easy steps and you’ll be well on your way:

  1. Sort & Purge – I think you’re starting to see a pattern with me regularly discussing the art of purging. With the start of every organization project, you should be diligent about getting rid of the stuff you don’t need. In this case, talk with your kids to see what toys they don’t touch anymore. Then, either make a pile to send away, or tuck them away in a box in the attic or basement for future generations.
  2. Create Zones – Think about what activities are performed in this space, and break the room down into appropriate zones. If you have a child who only focuses on her dollhouse and accessories, make this a primary space for her to play. If you have a lot of books, create a reading corner.
  3. Categorize – Within the zones, think about what toys can be grouped together, and purchase bins where those items can be stored. An easy way to store these bins is to tuck them under tables or benches. That way they’re out of the way, and you also have available seating and tabletop space! Sometimes it’s also effective to create a bin for each child so they can easily find their toys.
  4. Make it Kid Friendly – Most playrooms have books, and instead of storing these books on a normal bookshelf where the spine faces out, store these on a kid-friendly bookshelf with the cover facing out. You can also use something as simple as a decorative box so kids flip through and choose their favorite book by looking at the picture on the front!
  5. Think Beyond the Toys – If you regularly interact with your children in the playroom, you should think about having appropriate seating. If you regularly read to them, perhaps a beanbag would be a great cozy option! Also think about using the wall space to help organize. Use hooks to hang backpacks and even frequently worn costumes. With Halloween coming up, you know these costumes will need a home!

Photo: Fortikur

Keeping Your Family Activity Calendar Organized

Family calendar


I was talking to a busy working mother recently and she made the comment, “Sometimes it feels like I’m running a business with these Excel documents for family expenses and a master calendar for all meetings and activities.” The truth is (as much as it’s strange to say) your household is very similar to a business, and sometimes you need to use business tools to stay organized. The biggest area of strife for families is not being aware of commitments, and over booking. Most of the time this happens because there isn’t one central calendar visible to all parties. So first things first – create only ONE family calendar.

This will solve many of the problems! But of course, I have a few more tips up my sleeve. Next, you need to decide if you’re going keep it traditional using a paper calendar, or if you want to use an electronic option. I’m a big fan of using an electronic calendar like Google Calendar. It will also sync up with your phone’s calendar so you can get reminders wherever you are.

Whether you choose paper or electronic, assign a color to each member of the family. That way you easily see who has conflicting obligations – or meetings – and plan accordingly.

The next important thing is making sure you’re holding weekly family meetings to ensure you’re updating the calendar with the latest and greatest activities and meetings. Over communicating is always the best policy.

The last tip is to check your calendar daily. Similar to the workplace, you should wake up and consult your calendar so you can plan your day. There is nothing worse than remembering at 2pm that you were supposed to pick up the kids for an early release at 1pm.

As we dig deeper into the fall and winter seasons, remember that a central calendar is your best friend – and saving grace!

Photo: Mom of 6

Preparing Your Wardrobe for Fall and Winter: Tips from a Professional Organizer

Swapping fall clothes

As September winds down, I always think to myself – where did the summer go? It’s true – it goes by so quickly, but I’m genuinely excited for fall. After all, fall in New England is breathtaking…apple orchards, beautiful foliage, and that perfect crisp in the air. And with that colder crisp comes the need to change out your wardrobe! Out with the shorts, in with the scarves and boots.

By biggest piece of advice is to start NOW. I know, it’s only September, but if you don’t start early, one morning you’ll be greeted by a chilly day and find yourself running around trying to figure out where you stored your jackets. Below is a quick checklist of what you need to do to get your wardrobe ready for the fall and winter:

  • Compile and store your spring/summer clothing – Organize your clothing into categories (shorts, shirts, etc.) and store these items in large Rubbermaid tubs. If you have little storage, look to purchase the containers that can slip under the bed. If you are going to store containers in the basement, ensure the containers you purchase seal tightly, to prevent any insects or unwanted smells from entering.
  • Make a list – Most people end up forgetting where they stored their clothing, so it helps to list out your clothing on an excel sheet so you can look back once spring arrives.
  • Donate old clothing – Look through last year’s fall/winter attire and evaluate what you want to keep and what you want to ditch. This also means you should look through the entry way closet and give away all of those old jackets you haven’t touched in five years.
  • Hang and organize your scarves – Over-the-door hooks can be a great way to keep all of those scarves organized. You can also purchase scarf hangers if the back of your closet door is already filled.
  • Clear space for boots – Boots can take up a lot of room, and they don’t fit in most shoe holders. I always find the best way to tuck away your boots is on a shoe stand. You can designate your boots to the top shelf. Also, to keep them from folding over you can put empty wine or sparkling water bottles inside the boot so they keep their form.
  • Make a dry cleaning run – If you stored all of your jackets in the basement or attic, it’s likely these will need a wash to rid them of that musty smell. If you drop them off now, you’ll be ready to go by the time the first frost rolls in.
  • Make a list of what you need – After you’ve gone through and noted the clothing you’ll be donating, make a list of clothing or shoes you need. Yes, that means you get to go shopping!

I would shoot to check these items off your list by the end of September, that way in October you can enjoy apple picking, sipping cider and other fall activities in your new clothes – and freshly cleaned closet space.

Photo: Bed Art Home

Tip Tuesday: Kitchen Tips to Tame the Kitchen Clutter

Kitchen tips Kitchen clutter

I first touched on kitchen organization when I wrote about how to plan and organize for a move. But now we’re going to dive deeper and walk through a few of my favorite kitchen uncluttering tips. Let’s face it, it’s easy for the kitchen to take on clutter. It’s a commonly used space, and if you’ve designed the kitchen right, it brings people together! This is wonderful, but then all of a sudden there’s homework cluttering the countertops, cooking books sprawled out…things get messy! The good news is there are some quick tricks to deploy that will help you feel more organized in the kitchen.

  • Divide your kitchen into activity zones. Think through where you’ll do your baking, and where you’ll spend most of your time prepping for dinners. Then organize around those spaces. For example, in your baking area, put your primary baking tools, ingredients, etc. in the cabinet above or the drawers below. Also, if there is a kitchen island where you spend a lot of time working on homework, designate that as a “homework area” and put a basket underneath the island specifically for homework supplies (pencils, calculators, etc.) that way that “clutter” has a home.
  • Acknowledge your frequently-used items – If you always use your blender for smoothies, it makes sense to keep it out for easy access. For those items you infrequently use like serving platters and roasting pans, put them in the cabinets above the refrigerator or other spaces that are more difficult to access. If you’re tight on kitchen space, you can even place in the basement or garage.
  • Purchase the right organizing contraptions and shelving – It’s amazing how much these organizational components can make you feel less cluttered! First of all, lazy susans are truly a gift from the organization gods. Keep your spices on one in your cabinets so you can easily access without digging to the very back and destroying everything in your path. Lazy susans are also key for those corner lower cabinets that are filled with your dry ingredients. With one spin of the lazy susan, you can snag what you need. Additionally, use flatware organizers for storing utensils, as well as long, skinny tools. Lastly, to maximize space in your refrigerator, purchase low wire shelving so you can divide a once larger space in two, and store food above and below that wire rack.
  • Purge the pantry! – And of course, organize it, too. This is one of the spots that often need the most work. Before you get started organizing it, you need to take EVERYTHING out of the pantry, and throw away old food, items you haven’t touched in a while, etc. Then once you’ve removed everything, plot out your plan of attack. You should designate a section for baking supplies, snacks, paper goods, canned food, etc. Place items like paper goods that you don’t use every day up at the top where it’s a bit more difficult to access. Once you’ve designated a section, purchase bins, containers or jars to accommodate these items, and label, label, label! For example, you can fill a crate with baking supplies, and label the outside so it’s easy to identify these materials when needed. You can also purchase large jars to store flour, pastas, etc. so that you can rid yourself of bags and boxes that can often leave a mess.
  • Don’t neglect the space under the kitchen sink – This area can often get messy and become a black hole of cleaning supplies. To minimize the clutter, consider using tension rods to hang bottles of cleaner and small bins to store sponges and cleaning gloves. Another tip that I love is putting the roll of trash bags on a paper towel dispenser so you can rid yourself of those boxes and access trash bags easily.

I hope these kitchen organization tips can help you in your pursuit for a cleaner, more organized kitchen. Be sure to check back for more kitchen organization tips in the future!

Photo: Cute and Company

5 Ways to Make Packing School Lunches Quicker and Easier

Tips for packing school lunches

Labor Day has come and gone – farewell summer! – and that means the big yellow buses have taken your kids away. On one hand, this means there is a little less running around from one summer activity to the other. On the other, parents now have to invest more time in planning, prepping and following schedules…which includes that dreaded one-hour crunch time to get everyone awake, wearing proper clothing, toting the right school supplies, and of course, equipped with their fuel for the day – their lunch!

I’ve heard from parents across New England that creating school lunches can be one of the biggest chores, and frankly, afterthoughts as they’re getting their kids ready for the day. Below are five back to school lunch tips for saving time – and sanity! – as you go through the daily getting-ready grind.

  1. Make a meal plan for the week – Typically this includes dinners, but it should also include lunches so you can get everything you need at the grocery store at the start of the week. When you create this plan, you can get input from your kids, that way everyone is on the same page when they open their lunch each day. By planning ahead, you can also repurpose ingredients from dinner for use in school lunches. And there’s never any harm in making a dinner in “bulk” so you and your kids can have leftovers for lunch!
  2. Don’t forget about the budget – Be sure to include the cost for lunches in the greater meal budget. It’s always good to be mindful how much you’re spending to create each lunch, versus how much it costs if your kids were to get a hot meal at school. It’s also good to allocate funds per month for hot school lunches for those mornings when you’re running late, and you know that lunch isn’t going to be packed. Hey, it happens, and it’s always good to have a back-up plan!
  3. Do what you can the night before – There are several little things that can get done in advance, saving you much needed time in the morning. For example, you can store ready-to-go snacks in the refrigerator or pantry. Package up crackers or cookies, slice veggies/fruit and put in appropriate containers, etc. Additionally, sometimes you can get away with freezing food items that might typically go bad if prepped ahead. For example, you can store pre-made peanut butter and jelly sandwiches in the freezer, and if you’re in a pinch with no time on a given morning, simply pull one out and drop it in the lunch box!
  4. Use reusable lunch bags – Instead of spending money on brown bags that get thrown out every day, every kid should have his or her own lunch box. This way, no one accidentally grabs the wrong lunch! Also, kids generally get more excited about what’s in their lunch when they love the characters or theme of their personal lunch carrier.
  5. Purchase various sizes of plastic bags / containers – By doing this, you’ll have the right packing materials for any lunch item. To save money, it’s smart to stick to reusable containers, and you can generally find a good “starter kit” of different sizes at bulk retailers like Costco.

Photo: My Daily Find

Getting Organized for Back to School – Boston Professional Organizer

Back to School tips

Summer is nearly over for New England moms and their kids – where does the time go?! It’s a bittersweet time for families – parents will gain a bit more free time, but of course miss seeing their kids throughout the day. While there will be many emotions when the first day of school hits, one thing is for sure – it’s best to get physically and mentally organized so the process is as smooth as possible. In my world, the more organized you can be, the less drained (and frantic!) you’ll feel at the end of the day, week or even month! Here are five back to school organization tips to keep in mind as you send your kids back to school:

1)     Plan out your finances – The first step for preparing for back to school is always taking a look at your finances to determine what should be the proper budget. According to the National Retail Federation’s annual survey, total spending on back-to-school items is expected to reach $74.9 billion and the average family with children enrolled in grades kindergarten through high school will spend $669.28. That’s right, nearly $700. So how do you allocate funds? Think about all of the spending categories – clothing, school supplies, sports fees, physicals, etc. Asses each kid’s needs – prioritizing important costs over the more trivial costs – and from there start to piece your budget together. It’s also smart to keep some money in your back-to-school budget for unexpected costs in the fall – another jacket, an unexpected team sport fee, etc.

2)     Assess your needs – Don’t go into back to school season blindly! Take the time in advance to see what clothes you need to purchase, and what is on each kid’s classroom supply list. For clothing, go through drawers and remove anything that doesn’t fit or is worn out, and donate these to local non-profit organizations or friends and family. Also, take time with each kid to make note what clothing is stored where, so there is no confusion during morning prep. After you’ve purged, and made space, create a wardrobe list, while keeping the budget in mind! For school supplies, make sure you’re getting a list from each teacher of what each kid needs. Walking through the back to school section of your local Target with your kids – and no list – is a surefire way to spend WAY too much money, and wind up with a whole bunch of stuff you don’t need, and only a few items on your actual list.

3)     Create a Family Calendar – The start of school means the start of pick ups/drop offs, sports, dance class, and more. And with multiple kids’ schedules mixed in with yours, you can only expect for life to get a bit crazy. That’s why it’s especially important to create one universal family calendar. This can include school functions, deadlines, and even lunch menus. Putting everything on paper – or in a Google shared calendar – can truly make your world a better place.

4)     Bring current rooms to order – There’s something to be said for the saying, “Start with a clean slate.” The last thing you want to do, is start with a dirty, cluttered room, because likely after the first day of school, your kids will bring home loads of new books, papers, and of course, throw their clothes and backpacks around their rooms. A big part of organizing your kids’ rooms – or even the mud room – is creating a space for backpacks, shoes and other items being used on a daily basis. This will ensure everything has a home, and set the expectations of what goes where with your kids.

5)     Create a work station for homework and meetings – When the school year begins, it always seems that the dining room table starts piling up with school books, papers and pencils – and other clutter. With no clear work station, this can lead to disarray around the house. Whether it’s a little nook in the hallway, a carved out space in the garage, or a space in each kid’s bedroom, creating a designated work station can lead to a clearer, more organized home. And ultimately a more productive child!

Photo: Discovery


The Art of Taming Your Garage – Boston Professional Organizer

Boston Garage Organization

If organized correctly, the garage can be a haven for everything that doesn’t have a place in the house AND your vehicles. But most of the time what happens is the “stuff” from the home, builds, and builds, and builds…ultimately taking over any free space, and pushing the car to the curb.

If your car is parked in the driveway, perhaps it’s time to overhaul your garage and restore order with the following tips below:

  1. Set aside time – It’s important to make time for garage organization, or hire a professional organizer to help out with this task. A weekend is typically enough time for me to come to your house, develop a plan of attack, and conquer the clutter.
  2. Set up zones and categories – Look around to see what should be grouped where. Typical zones include gardening, sports and recreational gear, tools, additional pantry space, trash/recycling, and seasonal décor. Once you’ve nailed done the necessary categories, look at the items that don’t fall into these categories – like paint and luggage – and determine if there’s another space in the home where these items can go.
  3. Purge and donate – This is often a sensitive task for people because if an item has ended up in the garage, it’s likely the homeowner isn’t ready to part ways. I typically work with homeowners to help them decide what’s trash and what is a treasure. Sometimes this can be challenging, but the reality is you can’t invent space – something has to give!
  4. Think about the overall design and layout – Your design will depend on your lifestyle. If you are an avid gardener, then this zone should be easily accessible and take up a larger chunk of the space. If you have kids involved in five different sports teams, then each piece of equipment should be readily available and easy to access for the little ones.
  5. Determine storage solutions – Purchasing storage and cabinets should be decided AFTER you’ve created the floor plan. Leveraging vertical space is key in order to maximize available storage area. Peg boards can work wonders with hanging up gardening tools and sporting equipment. Also think about using the overhead space to hang bikes and other items that are taking up real estate on the ground. I have also found that rubber floor tiles can be a great addition if you’re planning on creating “livable” space within the garage. A great example of this is creating a crafting station for your kids, or a planting area for gardeners.

After your garage revamp is complete, it’s not over! The last, but oh-so important tip is to make sure you’re creating a monthly garage cleaning and purging so you can stay on top of clutter.

Photo: Décor Draw


Top