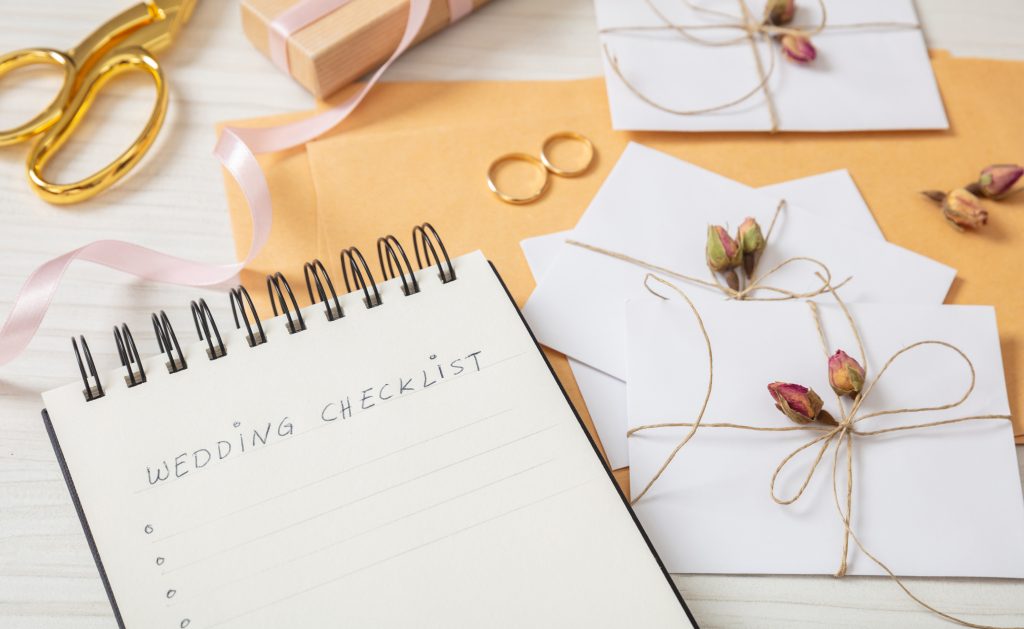
Five Must-Have Products for Your Cruise

Five Must-Have Products for Your Cruise

You have booked your dream vacation, a cruise. Congratulations! Now the time has come to start packing for your trip. Here are five must have products for your cruise. And the best part, they are all available on Amazon!

  • Waterproof Pouch– You are going to need a pouch that will hold your cell phone. Here is one example. Just make sure you test the pouch out before you put your phone in it to make sure it truly is waterproof, and you know how to securely close the pouch.
  • Water-Resistant Watch– It doesn’t have to be the most expensive but you want to make sure it works when near water. You are going to be near water and although you can’t wear a water-resistant watch when scuba diving, you need to be on time for various outings and make sure you make it back before your ship leaves you in port.
  • Magnetic Hooks– Who knew that the walls of a cruise ship are metal? Having a bunch of magnetic hookswill increase the way you can store items such as a hanging purse and cosmetic bag.
  • Magnetic Bag Clips– One convenient use for theseare to hold the ship’s daily schedule and adhere the clip to your cabin wall.

Sticky Notes– Yes, that is right! A great way to leave notesfor your cabin mate in case you each decide to split up for the day. Purchasing the extreme notes is worth it as they are water resistant!

What are your must-have products when you cruise?

Photo:TigerTravel

How to Organize Your Portable Media

How to Organize Your Portable Media

Everyone uses external, or portable, media to store and transfer files easily. This type of media can include SD Cards, Flash, or USB, drives, and even, in some cases, old CDs, flash, or USB, drives to store and transfer files. USB drives are an easy, inexpensive way to store and move files. You can literally find these devices for sale at even the local drug store. Over time, the sheer number of SD Cards, USB Drives, and, yes, even those dinosaur CDs, can accumulate. This puts you at not only an organization risk, because you don’t know what data is on which media, but also a security risk should one of those drives get lost. Here’s how to organize your portable media so that the right data is readily available when you need it, and so that all of your information is safely protected.

  • Do NOT Use a Portable as a Whole PC Backup.My first, and most important, piece of advice is that any data storage device you plan to use to transfer or share data should NOT be used to back up your computer. A back up of your primary PC is bound to include sensitive data such as account numbers, passwords, financial data, and even proprietary work files. Definitely back up your PC to external media. Place that media in a secure place in your home and leave it there. Alternately, use a secure account on the Cloud.
  • Gather Them Up.Start by going through your purse, your desk, your brief cases, and the places you typically keep media storage devices including those storage crates in the attic. Choose a single place to put all of your storage devices and put them there. A clearly labeled plastic container, makeup bag from a “bonus”, or shoebox works well for this purpose. As you go through the house during your daily routine and find storage devices add them to the pile.
  • Find Out What’s On Them.The best way to start organizing all of the files on your portable storage devices is to see what it on them! This may be a tedious job but how else will you know if there is anything worth keeping on the drive? Make time to insert each USB Drive, SD Card, or CD into a computer and see what files/folders are stored on it. Delete any files you no longer need from the drive immediately.
  • Put It All In a Single Place.Set up a folder on your computer or laptop called “USB Data”. As you go through each USB, CD, or SD Card copy the information you want to keep into this folder in a separate folder, such as “USB 1”, “USB 2” etc. This will put all of your data in the same place, but avoid overwriting files on different devices with the same file name until you can be sure they are not duplicate files.
  • Check for Duplicates.Once you have all of the data from those external drives in once place, compare those files with each other and to what you currently have on your computer. Delete any duplicates and anything already backed up to your primary computer backup.
  • Use the Cloud.If you are using external portable media to store files that need to go between multiple computers, consider a cloud-based service, such as DropBox, Google Drive, or Microsoft OneDrive. A list of highly rated cloud storage services can be found on PCMag.com by clicking here. Having only one version of a file floating around will cause less confusion.
  • Wipe It.Dispose of any external media you for whatever reason do not want to keep by wiping the drive. If you plan to throw the physical drive away, consult with an IT professional for ways to permanently remove the data from it before you do. CDs can be broken into pieces and thrown away or if you have a shredder that can shred CDs, all the better.
  • Mark It Up.If you want to also keep the storage device, you will need a way to identify the info. Although flash drives are small you need to label them. One way is to use a label maker and adhere the label to the drive. Some of the flash drives have a loop that you could also attach a label on a piece of paper and punch a hole in the label and tie a string or twisty tie and slip it through the loop. A black Sharpie Magic Marker also works great for marking CDs, USBs, and SD Cards.
  • Dedicate Space.Whenever you need to keep external drives, please make sure you have one dedicated spot to contain all of them, so you aren’t constantly running across them and more importantly, not knowing where the one you need is located.

The long winter months ahead are a great time to gather all of your external devices and sort them. This is a great activity for when you are streaming a movie on your PC or sitting with your laptop watching a movie you’re not quite into. Knowing where all of your data is will give you piece of mind, and having all those small, pesky storage drives in a single place will give you piece of mind.

Photo: Cristina M. Miller

Transitioning Your Pre-Teen’s Room to an Organized TeenCave

Transitioning Your Pre-Teen's Room to an Organized TeenCave

By the time most children turn 13, they have a combination of beloved childhood items and new video games, electronics, and games – not to mention clothes they’ve outgrown – taking up space in their rooms. Here’s how to decide what to throw away and transitioning your pre-teen’s room to an organized teencave.

  • Take it One Step at a Time. Decide which part of your teen’s room you’re going to tackle first. Are you going to take on that dresser full of clothes they’ve outgrown, or the childhood toys they haven’t touched in years? Is your teenager’s desk big enough to accommodate middle school and high school homework? Formulate a game plan with your teenager on how you will prepare for the years ahead.
  • Create a Homework Space. All junior and senior high school students need a place to do their homework. This space should include a desk big enough to accommodate a computer or laptop, a monitor, notebooks and printed handouts from teachers. It should also have drawers or storage for the “school supplies” they will need to do their homework. There should also be a place – be it the desk itself or a smaller stand – for a printer.
  • Shelve It. Wall shelves come in a wide array of sizes, styles and configurations and can be used to hold everything from books and video game cases to childhood toys your teen can’t bear to part with.  Decide what you will put on shelves and where the shelves will go in your teen’s room. After you hit Home Depot, hand your teenager an electric screwdriver and assist them in putting up the shelves. Not only will you have a more organized teencave, but you will also foster your teen’s independence.
  • Make That Old Bookshelf Multitask. Classic bookshelf units can be used to hold books or fabric storage bins that can hold the unsortable trinkets that teens always seem to pick up. A bookshelf placed at the foot of a bed, in combination with storage bins, can serve as a video game center. Place the TV on top of the bookcase, the different video game consoles on the shelves, and the extra controllers and accessories in storage bins on the bottom shelf.
  • Sit Them Up. Most teens can be found either on their computers or on their beds. Invest in a solid, comfortable desk chair and a firm foam reading pillow for their bed. Both will encourage good posture.
  • Have a Game Plan for Outgrown Clothes. Adolescence is a time of growth spurts. Teenagers generally need a new set of clothes every 6 months. Have a bin set up for outgrown, unwanted clothes to make it easy on your teen and you. Decide what you want to do with that clothing. Do you have younger children to save the clothes for? Can you consign or give away the clothes to a charity or another family?
  • Let Go of (Some) Childhood Toys. Have your teen decide which of their childhood toys and memorabilia they want to keep in their room, what they want to save, and what can be donated or recycled. If they don’t want an item, don’t force them to save it just because YOU have memories of it. If you have the opposite problem of your teen wanting to keep it all, set limits of a quantity or a space.
  • Don’t Forget the Closet. Store seasonal items such as winter jackets and swimsuits, in your teenager’s closet. Airtight storage bins can be used to store childhood items your teen isn’t ready to part with. Upper closet shelves are perfect for board games that only come out periodically.

Once you’ve done all this, encourage your teenager to keep their new teencave clean. Give them the weekly chore of cleaning their room and putting away their laundry. Encouraging your teen to organize and keep their room clean will foster their independence. Bonus: you’ll cringe less when you open that perennially closed door.

Photo: Luis Rainero

How to Successfully Plan and Prepare for a Cruise

Cruises offer a wide array of experiences and entertainment for an unbeatable value.  With a wide array of ships and destinations, you can sail to and from just about anywhere in the world, even Alaska.  Which destination and what type of cruise are for you? What do you do once you book? How do you pack? Check out the answers to these questions and more below on how to successfully plan and prepare for a cruise.

  1. Pick a Boat.Today’s cruise options include everything from Maine Windjammers to luxe cruise lines. Before choosing a cruise, ask yourself who you will be traveling with, why you’re traveling, and what type of traveler you are. For family vacations, one of the major cruise lines is probably ideal. If you’re looking for a young, hip, party boat, you might want to consider a line that caters to a young adult crowd.  Are you more at home in hiking in the woods?  Maybe a small ship traveling up the coast of New England is for you. Choose the best type of cruise for your traveling companions, purpose, and unique personality.
  2. Where To? Where do you want to go? Are you wanting a warm, sunny break in Mexico, Bermuda, or the Bahamas? Are you looking to see the coast of Alaska, or sail the Mediterranean? What about heading up the coast of New England? Decide where you want to go and check out the cruise lines that travel there.
  3. What’s Your Budget? Set a budget and decide what you want to spend it on. Is your priority a luxury ship with all the extras? Will you splurge on extras such as shore excursions, alcohol, specialty restaurants, or off-duty shopping? Know the answers to these questions before you start looking for your perfect ship. When you set your budget, be sure to account for any “hidden” fees or extras you might not find out about until you’re on board, such as additional fees for premium liquors.
  4. Listen to the Critics. CruiseCritic.com is a great place to get impartial reviews from other passengers about specific cruises and cruise ships. Before you book, check out the passenger reviews and pictures from the ship you are considering. A one off about a poor cabin steward can be dismissed. Several people complaining about the food should be paid attention to.
  5. Get an Agent. Yes, you can book a cruise directly, but a cruise travel agent will provide invaluable assistance. Agents can help you choose and get the best deal on your dream cruise. They can also advise you on options you’ll want, such as a balcony stateroom, or a late dinner seating. Agents can also take some of the more annoying, cruise-planning off your hands, such as purchasing insurance, booking and coordinating transportation to and from the port, and even printing and mailing luggage tags and cruise documents to you.
  6. Insurance is Key. Very often, cruises are booked months in advance. Anything can happen between when you book your cruise and when you finally set sail. Purchase all-inclusive travel insurance that covers everything from the onset of a pesky sinus infection to a family emergency.
  7. Choose Your Options. Once your cruise is booked, read up on all the options the ship you are sailing on offers, including food and drink packages, cell phone and data service, shore excursions, and on-board activities and experiences. Choose the ones that match your personal preferences and budget. Decide if you want to book these options in advance to be sure you get the activities and time slots you want, or if you want to risk getting a better deal by booking on board. Very often, special deals for on-board services, such as spa treatments, are offered on the day the ship sails.
  8. Know Where You’re Going. Read up on the ports of call you will be visiting. Select what you want to do and see at each port, and how you want to do or see it. Do you want to go independently into all the ports or sign up for guided excursions? With guided excursions there is less risk of the boat departing without you, but these are often more expensive than self-guided tours.
  9. Check Out the Itinerary. Very often, a cruise line’s itinerary, or a sample thereof, will be posted on the cruise line’s website, or on one of the cruising message boards. Check out what kind of activities will be offered, the ship’s dress code, and evening entertainment. Most luxury cruises have at least one “formal” night. More casual cruises, such as Maine Windjammers, offer a lobster bake. Know what you will need to bring and start shopping for anything you don’t have in advance to get the best deals.
  10. Read Up. Spend some time researching cruising on the ‘net. Amazon offers several inexpensive e-books on cruising. A favorite is Tips from the Cruise Addict’s Wife by Deb Graham. The Internet includes several solid packing lists and tips for first time cruisers.  CruiseCritic also has a “Roll Call” section for passengers booked on a specific cruise ship and sailing to connect with each other prior to departure. A little advanced preparation will go along way once you’re on board.

Vacation time is so precious to us. A cruise can be a fabulous way to spend that time. By doing your homework in advance, you will ensure you have the experience of a lifetime from the moment you set sail.

Photo: Cristina M. Mille

You’ve Found Your Dream Job, Now What?

You've Found Your Dream Job, Now What?

Congratulations! You’ve found your Dream Job, or at least a new job with new opportunities, now what? Leaving a current employer for a new position is far more than simply giving notice and collecting your last paycheck. Here’s everything you need to do to end your tenure with you now former employer on a positive note.

  1. Wait for It. If your new employer requires a background check, always wait for official notification that background check has cleared before giving notice, no matter how tempted you are to do so beforehand. Even if you are squeaky clean, you never know what could come up.
  2. Exit Gracefully. Like my Mom used to say, ‘You never know when you will run into that person again…’. Unless your well-being is in danger, always give notice both verbally andin writing to your manager. HR will need the written notice for your employee file. Start with “I am very grateful for this opportunity, unfortunately…” and then give your reason for leaving. The rule of notice holds true even if you never intend to use a company as a reference. LinkedIn lives on forever. You never know who knows who.
  3. Clean Your Cube (Or Office). Removing your personal effects from your cubicle or office space gradually eliminates the need to carry large boxes out on your last day. You will also be prepared if your employer asks you to leave immediately on receiving your notice. Take a few things home every day. Backup and delete personal files, including emails, from your computer. Take any hard copy personal files home.
  4. Don’t Take What Isn’t Yours. Leave all company property, no matter how old or unused, behind unless you have permission to take it with you. Even more importantly, understand your employer’s Intellectual Property Do not take copies of materials that fall under this policy, even if you created them. If you must take such materials, i.e.: if you are a writer and need material for your portfolio, get your employer’s permission. Carefully remove all references to proprietary information, including client names, specialized processes, and patented technology, from such materials.
  5. Understand Your Benefits. If HR does not schedule an exit interview to review separation logistics, request one. Ask about your last paycheck, payout for unused vacation time, medical benefit eligibility, and 401K policies for former employees.
  6. Confirm when you will be eligible for medical, dental, and vision coverage with your new employer. If these benefits do not start Day 1, COBRA at least your medical coverage until they kick in. Even if the gap period is only a couple weeks, COBRA! A couple years ago, my friend switched jobs and didn’t COBRA. During that time, her son had to go to the E/R. The result was over $5,000 in medical bills. Don’t gamble with your health.
  7. Know Your Vested Balance. If your 401K has a vested balance under $5,000, a former employer has a right to remove you from their plan without notice. Avoid potential tax penalties by contacting the firm that manages your 401K and rolling over your vested balance if it is below this threshold. If you have a vested 401K balance over $5,000, contact the 401K manager and find out what the fee for leaving your money with your former employer will be.
  8. Stay in Contact. Be sure to gather any contact information for colleagues you will want to stay in touch with for future networking. Connect with these colleagues – and endorse them for relevant job skills – on LinkedIn. For more information on using LinkedIn to strategically manage a job change, check out this article on The Muse.
  9. Leave on a High Note. On your last day, thank your manager, co-workers and any personnel you have worked closely with. If you are required to have an exit interview, by all means, don’t go on a rage about co-workers or management. If you are leaving because of a specific conflict, be honest about the conflict, but not bitter. Have a positive word to say about everyone you worked with.

The grass may be greener on the other side, but don’t leave the pasture before your last day. Perform your job duties to the best of your ability until you turn in your ID badge. If you leave your former employer thinking highly of you, you will reap great rewards in the future!

Photo: Pixabay – Wemer Heiber

Setting Up for a Successful Garage Sale

Setting Up for a Successful Garage Sale

Holding a garage sale is a fun, profitable, eco-friendly way to clear clutter from your home. The saying is true “one person’s trash is another’s treasure”. Virtually anything can be sold at a garage sale. Old glassware? Check. Fabric scraps? Check. Old kids toys? Check. Discarded electronics? Absolutely! Just throwing items out on a folding table and putting a sign on your lawn won’t make your sale successful. Here are some tips for maximizing your time and creating a fabulous, fun garage sale.

  1. Pick a date. Research the best time in your town to have a garage sale. You can also check your town website to see if a Town-Wide Garage Sale is planned. If so, sign up for it. If not, pick a date and put it on your calendar. Setting a deadline in advance means you won’t procrastinate getting ready for your sale!
  2. Start gathering. A garage sale is a perfect excuse to go through your home room by room and pull out items you no longer love and use. Check your attic for old electronics, baby clothes, and toys gathering dust. Place them in a central location in your house.
  3. Sort and Clean. Sort each item by category into its own container for storage and easy transport to the area where you’ll set up your sale. As you sort each item, wipe it down, inside and out. Buyers will be attracted to clean items and you’ll get a better price for them.
  4. Price it Out. You’ll sell more items if they are priced in advance. Set a realistic starting price for each item but leave some wiggle room for bargaining. If you’re not sure how to price out your items, check out The Ultimate Garage Sale Pricing Guide on Angie’s List. Use neon colored price tags to make the prices easy to find. Several hardware and stationary supply stores sell pre-printed, adhesive price tags specifically for garage sales. These are a great investment. Use a black Sharpie to write custom prices.
  5. Organize – Don’t you enjoy going into stores that have defined categories? It is so much easier to shop. Have sections for clothing, electronics, housewares, travel; whatever you can group together will make a nicer experience for your shopper and you want them to stay and look around. If you have several of the same item, create a sign with the price of each item on card stock.
  6. Advertise – Put your yard sale on Craigslist, Nextdoor, and any town related news sites. List a few teaser items and definite hours. If you don’t want early birds, state that! You can also specify cash only and items need to be carried away that day. If you can’t assist hauling stuff to people’s cars, say so.
  7. Have Cash on Hand. I recommend having at least 2 rolls of quarters, a handful of $5 bills and at least $20 in singles ready before your first customer arrives. If you expect any items to sell for pennies, nickels, dimes, or quarters, make sure you have that to give change back. Use a cash box or large, zippered pouch to keep your money in. Those cosmetic cases that come with beauty bonus buys work great for this purpose.
  8. Bag It. Have extra bags, plastic boxes, and newspaper on hand for customers who request a bag to carry their item in, purchase multiple items, or purchase fragile items. You can store up plastic grocery bags and reuse them for this purpose.
  9. Hydrate and Screen. You’re going to be standing or sitting in the sun for the majority of the day. Avoid dehydration and sunburn by keeping plenty of bottled water and sunscreen on hand. Reapply sunscreen throughout the day.
  10. See You Next Year! Have a plan for what you will do with your unsold items at the end of your garage sale. On my last sale, I created 3 separate groupings: Toss, Sell Online, and Save for Next Year. Anything I was going to sell online (VCR from 2000 anyone?) I put a neon sticker on. Everything I plan to sell next year went into boxes labeled “Save for Next Year”. I photographed the stuff I planned to sell online and posted it. The “Save For Next Year” boxes went into my attic.

Above All, BE SAFE! Do not let shoppers into your home no matter what the emergency. If they are truly in distress, call 9-1-1 immediately. Otherwise, direct them to a nearby public facility.

Happy Selling!

Photo By: Cristina M. Miller

Simplify Your Hobbies

Simplify Your Hobbies

If you’re like any hobbyist – sewer, woodworker, scrap booker, etc. – you’ve accumulated materials for projects that have never been done and scraps from projects that have. These tips will help you decide what to keep and what to toss from that craft closet and simplify your hobbies.

  1. Evaluate – If you have many hobbies, are you really working on all of them? Can you pare down to just a few and focus on them? Are you engaging in them regularly to justify all the stuff that goes along with each hobby? It’s not a bad thing if decide you enjoy a different hobby. Letting go of the items for the less interesting hobby opens up space for the hobbies you enjoy more.
  2. Make Space – Choose a place where you will work on your hobby. This can be a dedicated area, such as a sewing room or basement workshop, or a double use space, such as a dining room for scrapbooking or a home office for digital photography. Ensure the space you choose is big enough to support your hobby and has the proper furniture for it. Can you spread a queen-sized quilt across that dining room table? Is there a bench in that basement workshop to properly trim the lumber for that bookcase? A friend of mine uses her living room sofa table as a sewing desk. It allows her to be close to her kids while she is working. A popular place for scrapbooking is a dining room table.
  3. Storage – Containers are your best friend for hobbies. They not only keep your stuff all together, they act as limiters to how much your need to be storing. You don’t have to spend a lot of money on expensive, hobby-specific storage devices for this. Check out this articleon how to reuse everyday household containers for craft supplies.
  4. Easy Access – If you can’t grab the stuff you need when you need it, why bother? You need to find a dedicated area to store your hobby items. Find a dedicated area to store your hobby items sorted by hobby. This Neatfreak! closet organizerworks great for storing hobby materials in a closet and requires no assembly. Whether you turn a guest room closet into the storage area or a dedicated corner or shelving unit, pick a location that will enable you to have ALL items associated with that hobby in one spot. If possible, it should be the place where you will work on that hobby.
  5. Sort and Label – Most of us only have a few hours a week to spend on our hobbies. Make the most of that time by placing all of the materials you need for each specific project you are working on in its own container and label that container. These 12×12 containersare great for scrapbooking. The zippered plastic bags retailers sell sheet sets in are excellent for sewing projects. By sorting and labeling your hobby projects, you’ll be able to instantly grab what you need when you need it.

Photo: Alison Headley

Organize Your Online Presence Before Launching a Job Search

Organize Your Online Presence Before Launching a Job Search

Launching a new job search is more than sending out resumes. These days your resume, online presence, personal and professional life need to be organized to tell a cohesive story. Here’s how to organize your online presence before launching a job search.

  1. Google Yourself – It’s important to know what a prospective employer is learning about you when they do an Internet search on you. You need to find out first and clean up any erroneous information. To Google yourself, enter your name, city and state, and, if you’ve moved recently, your previous location into Google. Check both website and images. Contact any sites with information that could harm you in a job search and ask them to delete it.
  2. Go Social – Make sure there are no forgotten social media profiles – including blogs – on the Internet (MySpace anyone?). If there are, delete the accounts. Set the privacy settings on your Facebook, Twitter, Meetup, etc. and any other social media sites so all anyone can see is your name, profile picture, and location. Change your banner images to be politically neutral or make them private. Scrub your newsfeeds of anything you would not want an employer to see.
  3. Ditch the Selfie – Your profile pictures should be current and across all professional and social platforms. Dress up in interview attire, stand against a neutral background, and take a picture with an actual camera. Change into your “play” clothes and repeat. Crop both pictures to show only your face and shoulders and use a program like Photoscape (http://x.photoscape.org) to balance the lighting. The first picture goes on your LinkedIn profile. The second goes on ALL of your social media sites.
  4. Match It Up – Your resume should highlight your skills and career achievements first. It should also be Search Engine Optimized (SEO’d) around the type of job you are looking for. It should also exactly match your LinkedIn profile. You do not want an employer reading your resume and then seeing something different on LinkedIn.
  5. Use the Technology – You want to stand out and grab attention when you are searching for your new job. Besides a standard resume, how else can you present yourself? Use video, Pinterest, a website, or blog to highlight your creative side. Showcase your work! Join and actively contribute to groups that align with your current and/or desired industry and profession. You need to show that you understand the power of digital platforms and are technologically savvy. Saying it is one thing but showing is more powerful.

Coming Up: Organizing Your Resume and Job Search Application Paperwork.

Photo: Pixabay – Gerd Altmann

How to Better Organize Your Cellphone

How to Better Organize Your Cellphone

We love our cell phones and tablets. But when was the last time you looked at all the apps you have accumulated? Some people can scroll screen by screen searching for the app they want and it’s hard to find among all the useless apps they have on their devices. How to better organize your cellphone?

  1. Delete –Just like we need to clean out our refrigerator or closets, we need to declutter our cellphones. Ask yourself which apps you use the most in your day to day life. Not sure which apps you use vs. those you don’t? Check your phone’s battery and data usage in “Settings”. The apps that draw the least power or use the last amount of data are the ones you don’t need. Delete anything with a low data usage in particular.
  2. Folders –For some apps it may make sense to create folders on your screen to help manage those apps that you use but not frequently. I have a folder on my iPhone for all the airlines. I don’t use them often but when traveling, I like knowing I have the app on my phone for each airline I will be using. Google ‘how to create folders’ for your model of phone.
  3. Organize –Put the apps that you use most frequently on the first screen, so you don’t have to scroll through the screens to find the ones you want. On an iPhone, when you add an app, it goes to the last page or first open slot. You can move the apps around to suit your needs.
  4. Home Screen –If you have an iPhone you can store 4 of your most used apps in the dock. No matter what screen you are looking at, the 4 apps on the bottom always are visible. I keep my phone, email, safari, and calendar in my dock as they are the ones I use the most. Customize based on your preference.
  5. Storage –Use the cloud for storage and back up. This will help save memory on your phone. Photos, music, and video take up a lot of room on your phone. Putting them in the cloud saves space and memory. Depending on how much you need to backup and store, most cloud services are free. If they do charge, it is not that much per month. Well worth it in case your phone dies or is lost.
  6. Streaming– Using a streaming service such as Spotify or Pandora allows you to listen to any music but not have to store the music on your phone. They all offer a free version so decide how much you will use the service and if you want to be ad free by paying a monthly fee. If you use these services, decide if you will use data for them, or just run them over Wi-Fi when it is available and update your phone’s settings accordingly.
  7. Backup!– I mentioned backing up your phone in the storage section, but it needs to be repeated. I have worked with a lot of clients who never backed up their phone or thought they were only to find themselves without precious photos, text messages, videos, etc. BACKUP your phone on a regular basis. It is worth the extra money!

Photo: Pixabay  Approved for Reuse

Happy 4th of July!

Boston Professional Organizer, 4th of July

Happy 4th of July! Enjoy this patriotic holiday if you live in the United States by taking the day to celebrate our country’s history and freedom.

Photo: HuffingtonPost

Top