Halloween is right around the corner. What are some alternatives to Halloween candy that you can give out to trick or treaters this year? With so many allergies to be concerned about, why risk throwing your money away with candy that may just end up in the trash? Here are a few suggestions for non-candy ideas to give out this year.
Stickers – What child doesn’t love to have stickers to put on their notebooks or papers?
Pencils or pencil erasers – If you are handing out pencils, don’t buy the ones that are already sharpened. We want the children to be safe and not poked with the sharpened points.
Bouncy small balls – Lots of hours of fun will be had while playing with these balls.
Washable tattoos – Children like putting these on and parents love that they are not permanent.
Mini flashlights – They can attach them to their backpacks. Keep your children safe.
There are many more non-candy ideas. These are just a few to get you thinking. What will you be handing out this Halloween?
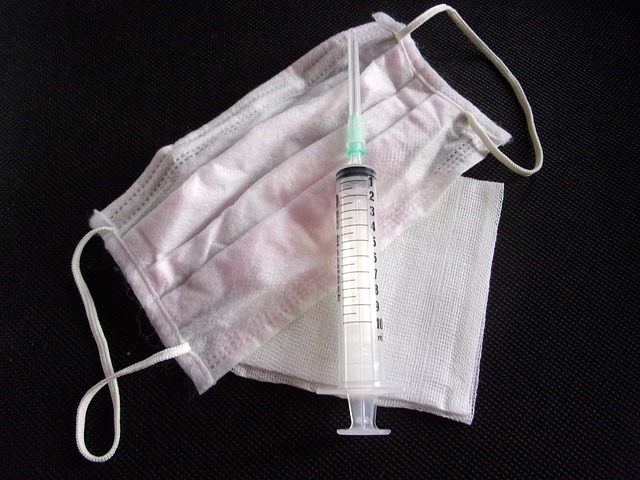
Not making time for preventative health care, including an annual flu shot, can cost you money, time, and stress, as well as potentially creating a health crisis later. Save money and stay healthy by making time for and understanding the importance of getting a flu shot and other preventative medical care.
This is the time of year when doctor’s offices and pharmacies are advertising that they have flu shots available. I am not a doctor, but I highly recommend that you get a flu shot this year. From personal experience, I have faithfully gotten a flu shot every year for as long as I can remember. My mother, on the other hand, has refused to get one. Last year she got the flu in January and then again in early June. She is now, after all these years, going to get a flu shot this fall.
Unfortunately, it may take a health crisis to realize the importance of being on top of preventative care for yourself and your loved ones. I also know a business colleague of mine who last March, in the middle of an extremely busy work cycle, got hit with the flu and had to work from home, lost contact with her husband, an accountant, and missed out on numerous volunteer events all because she forgot to get her flu shot.
How can we avoid these unfortunate situations? I often talk about the importance of using a calendar. This is another instance when scheduling preventative medical care ties into the use of a calendar.
Pull out your calendar now and see if you have a doctor’s appointment already scheduled in October or November. If not, can you call and schedule one for the specific purpose of getting a flu shot? See if your town offers flu shot clinics or just stop into a pharmacy and get your flu shot there. I just looked at my calendar and see that I have an appointment with my primary care doctor in early November. I now know that this is when I will get my flu shot. If they are out of them when I am there, I will then go to my local pharmacy and get it there.
There is other preventative medical care that you can be on top of such as bi-annual dental cleanings, annual physicals, and mammograms. I find that once I have scheduled these, as soon as I am checking out from that appointment, I am making the next one. I find that if I leave the doctor/dentist office without a next appointment, I will either keep forgetting to call, or keep pushing the call off due to my busy schedule. If you haven’t had any of the annual appointments in a while, may I challenge you to pick up the phone and schedule them?
I know too many ladies who, if they had not been faithfully getting annual mammograms, would have had much more advanced breast cancers. Once you hear of these jarring events, I would hope that it would encourage you to run to your phone and schedule an important annual exam.
Being in control of your health related appointments really will help save you time and money. More importantly, it may save your life!
Have you explored the use of grocery shopping and delivery services yet? How do you get the best value from services like Instacart, Amazon Subscribe and Save, Prime Pantry, Peapod, and other grocery shopping services?
Grocery shopping and delivery services – even online “order and pick it up at the customer service counter rather than walking through the store and waiting in line at the check-out” services – are gaining in popularity, but are they really worth it? Here’s how to quickly decide if using a shopping and delivery service such as Instacart (Groceries), Amazon Subscribe and Save (Household items), Amazon Prime Pantry (Groceries), and Peapod (Groceries) are worth the money.
Costs – There are several factors that go into determining if these services are worth your money. Considerations include your gas and car mileage to go to and from a store to buy your items. What about your time? How much is it worth? If you are a person who likes to compare prices, how much time are you spending determining if buying in bulk at a Costco or BJ’s is less expensive than ordering online at one of these shopping services?
You also need to factor in the cost if you frequently do take out for dinner or eat out for a number of meals. Those costs really add up, and it may be that the extra dollars you will be spending on delivery fees make sense. Plus, the added bonus is by eating at home, you are more than likely eating healthier.
When you shop, if you buy items that are not on your shopping list, you may really benefit from using online shopping services so that you only purchase what you need and aren’t tempted as you walk through the store. You won’t be able to smell yummy bakery items in their ovens tempting you to buy baked goods just because it smells great and you are hungry.
If you live in rural areas and you forget a few items, these services really are a valuable resource. Just the gas alone to have to run back out and pick up the items you forgot will be a no brainer in using delivery services.
Timing – You may find that there are times when these services can be a life saver such as when you are sick and can’t get to a store. Or what about when you are traveling? A client was just telling me how she uses Instacart when she and her family travel. Her daughter has two small children that are still in diapers. Rather than packing 2 weeks’ worth of diapers or having to locate a store when they arrive, she has the diapers and other bulky items shipped to her at her travel destination. Moreover, if you are in a really busy phase of your life, these services can be a true life saver. The delivery fee, if any, is well worth it for peace of mind!
Timing may also be an issue when choosing a delivery time. Will you be home to bring your groceries in your house? It may not matter if your order doesn’t include perishables. However, if you are ordering items that have to be refrigerated, having someone at home to accept the delivery is a must. If you can be more flexible with the delivery window, you may be able to save some money.
There are definitely pros and cons to using these services. You need to evaluate your situation to see if they will work for you. Let me know your experience with using grocery shopping and delivery services.
The kids are back to school, family summer vacations are over, and the house is at peace again. Here’s to celebrating back to school with your children, including your teenager, so that they all get off to a great start.
Night before prep – To avoid running around during the morning, what activities can you accomplish the night before? May I suggest preparing lunches so all you have to do is gather any refrigerated items and add to lunch bags/boxes? Wouldn’t it be helpful to have your children make sure their backpacks are loaded and ready to grab on the way out the door? Can you or your children pick out their clothes and have them ready to put on?
You might also consider having the breakfast table set and ready with anything you are able to lay out for breakfast the night before. Talking with your children to make sure they don’t have any permission slips or papers to sign the night before will avoid last minute panic. Do they need gym clothes or anything special for the next day?
These tricks will speed up the morning activities and perhaps allow a few more minutes of precious snooze time.
Calendar – How does your family communicate and stay on track? Do you use a digital family calendar like Google calendar or iCalendar? Or do you use a paper calendar? Regardless of the method, are you and your family making sure all your activities are on the same calendar? It is so easy to assume everyone knows that dance class is on Tuesday at 6pm but having it on one calendar that the entire family can see will avoid double booking or missing an activity. Seeing all events in one place will allow better planning of transportation and meals. Even color coding each member of the family will make it easy to know which person is doing what each day of the week.
Shopping Lists – This time of year as school begins seems to be the time that you may feel as if you are at the store every day picking up a last minute school supply for your children. How do you organize and coordinate your shopping lists? Is there a central place for all members of your family to list items that they need? Alternatively, do you use a digital shopping list that everyone has access to? Sharing the list will allow everyone to add items they need; therefore, when you are out and about and near a given store, it is easier to grab the item instead of going all the way home, only having to run out to that store.
Some of these tips may already be in place in your household but if not, I am hoping that at least one of them will help make your school year a more enjoyable experience at your home. What are some other ways you create a successful school year?
It’s summertime and the kids need you home to take them places, but you need to work. Here’s how to work from home successfully.
Boundaries – Now more than ever is the work/life boundary important. You still need to work, but you are at home so other family members may see you as available. You also have to get in the mindset of working from home and not be tempted to do the laundry or wash dishes when you should be working. How do you establish that? It works better if you have a dedicated room in which to set up shop so you can, hopefully, close a door to life outside of your work. If not, you will need to be creative by telling others and yourself that you need to work from x to y and that you can’t be disturbed. Using a timer may help you all know when you are on and off work time. The same goes for your workmates. They will need to know when you are available for calls, meetings, and consultations, to name but a few.
Work Space – How can you set yourself up to be successful? What tools are needed to duplicate what you are accustomed to having around you when you work outside of your home? Make sure you do have everything you need so you can seamlessly do your job. If your office requires you to work on an encrypted computer, have the IT person verify that you can log into your email and other programs when you are away from the office.
Approval Process – Sometimes you have an emergency at home or are sick and your doctor doesn’t want you to infect others, so working at home needs to be approved by your boss or HR. What is the culture of your office? Do they allow employees to work from home? How do you go about setting this up? More and more companies are allowing employees the flexibility to work from home, but don’t just assume this is your decision alone.
It really does take discipline to work from home, but you can be so much more productive when you have fewer interruptions from co-workers or the noise of the office. Being properly set up will be the key to your success whenever you will work from home.
Everywhere you look there are trendy dorm room accessories and “must have’s” for teenagers heading off to college. Here are some helpful planning tips for your college-bound teenager and his/her home away from home during the school year.
Furniture – Most college dorm rooms are typically furnished with a bed, dresser, and a desk. Any other piece of furniture you add needs to be multi-functional as square footage is at a premium. For example, if you want to add seating, you should make sure it can also act as additional storage so think ottomans or a trunk.
College Checklist – I am not going to recreate what has already been done. Here is a great checklistthat you can customize for your student.
The next few are for the would-be-student:
Pack Wisely – You will want to personalize your room but don’t bring your entire bedroom with you as you are sharing space with a roommate. Also, do you really want to risk losing a family heirloom? Keep it safe at home. If you are attending school in a climate that has different seasons, you can always bring the other season’s clothes back with you when you go home on break. Take a few cold/warm weather items as temps do change quickly, and you want to be prepared. Or have your parents send you a care package with items you need later in your first semester.
Study space – If you plan to study in your room you will want to have a comfy spot to read and work on your computer. If a desk isn’t your style, you may want to have a compact lap desk such as this oneor this is another stylethat can double as a lap table when eating in bed or while watching tv. Depending on your style there are a number of chairsthat would not only fit in your room, but would also be comfortable to lounge in.
Communication – It goes without saying that you will be sharing a dorm room. Take the time to reach out to your roommate to get to know him/her a bit before living together. See what items you will both be bringing so you don’t end up with 2 microwaves! You don’t have to be best friends with this person, but you will be spending time with him/her, so embrace the experience.
Starting college can be a really fun time, but with it comes a lot of stress over the newness of everything all at once. Being prepared and having a room set up before you begin classes will take a lot of pressure off you, and you will be able to settle in sooner to begin this exciting new phase of your life.
August is one of the hottest months of the year in any area of the country, including New England. Here are some ways to stay safe and cool as well as ways to avoid sunburn and dehydration while soaking up the rays at the beach.
Choose Appropriate Sunblock – Doctors advise using sunblock on all our exposed skin throughout the year, but especially in the summer months. The question is how much SPF is appropriate. The range between 30 and 50 should be adequate protection for everyone, including people who are most sensitive to sunblock.
Properly Apply Sunscreen – Using sunscreen is the first step in preventing your skin from premature aging and skin cancer, but you also need to properly apply it. All exposed skin needs sunscreen. For adults, the recommended amount is to use 1 ounce or the equivalent of a shot glass. Thoroughly rub it into your skin and apply it at least 15 minutes before heading out in the sun. Reapply sunscreen every 2 hours when outdoors or immediately after swimming or sweating.
Protect All Your Body Parts – If you don’t like applying sunscreen to your face, make sure you wear a wide brimmed hat to protect your face and the back of your neck from sun rays. If you have thinning hair or no hair on your head, wear a hat or apply sunscreen to your scalp. Don’t forget about your lips. Use a lip balm with an SPF of at least 15. When lying out in the sun, remember your feet, especially the bottoms when on your back. Ears, backs of arms, legs, and the back are some of the areas most forget to protect.
Hydration – Staying hydrated when outdoors is key, and water is the best for you and your body. Try to avoid drinks with caffeine as they dehydrate … along with alcohol. If you cannot avoid alcohol, alternate between alcohol and a glass of water or a drink such as coconut water or a sports drink, which is high in electrolytes.
Water Bottles – There are so many water bottles to choose from. Everyone has his favorites, and you may have a few different types depending on the activity you are doing. It really is a personal preference. Check out this link to see the best water bottles of 2019. I really love cold water so for me, I prefer to use a steel water bottle that keeps my water cold for at least 12 hours. The top dispenser is yet another personal preference. Shop around and hold the bottle to make sure it meets your needs.
Summer is a short season in the Northeast, so enjoy the sun. Nevertheless, be careful of its harmful effects, and remember to stay hydrated so that you can fully enjoy yourself.
Ah the teenage years! As your teen gets older, some will find a part time job. Others will go to summer camp or an extended school year (summer school) program. Some will do neither. Here’s how to navigate respecting your teen’s summer vacation while ensuring they stay active.
Get Them to Crack Open a Book – Most schools provide a summer reading list. How many times is that list forgotten and then there is a mad dash as school approaches to read those titles? Why not create a schedule? Depending on your teen’s daily commitments, try to carve out the same time each day or week to focus on reading. Could it be right after dinner? Spending time reading for at least an hour or 2 will get a lot of the required reading done without arguments.
Encourage Them to Volunteer – What are your teen’s interests? Is it sports, medicine, animals, older adults, or children? Aligning their interests in a volunteer position will be a win win for everyone involved. Check with organizations like Special Olympics if it’s sports. Look into animal shelters if they love animals. See if your local senior center needs any volunteers or is the hospital looking for help. Volunteering is sometimes a requirement for high school graduation, however, what a life skill to expose them to now.
Tell Them to Get Physical – Fresh air and natural sun light is important for all of us. Making sure your teen isn’t just inside all summer may be a challenge. Limit the screen time by balancing time doing physical activity. Swimming, bike rides, walking, or joining a summer sports team will get your teen some healthy workouts. Compromise by setting time limits on how long they can stay inside glued to their video game consoles or phones. Offer an allowance incentive for outdoor-related chores such as mowing the lawn and gardening.
Let Them Have Plenty of Downtime – Just like we enjoy our vacation and time off of work, respect that your teens need down time after school gets out. During the school year their time may be overtaxed so make sure you don’t overschedule their summer as well. Let your teen sleep in on days they are not working. Look the other way if you catch them lounging on the couch for a few hours.
Achieving a balance with your teen between work and play can be challenging, but it is possible. Set firm rules, be willing to compromise when it won’t compromise your teen’s well-being, and offer them rewards for working hard at a summer job, household chores, or summer school work such as reading. You will be happy and so will your teenager.
Many families move during the summer, so they don’t have to pull kids out of school mid-school year. However, moving with a family is far more than just packing boxes and renting a U-Haul or hiring a mover. Here’s how to organize a seamless move to a new home when you have children.
Start the Countdown – Once you know you are moving, tell your children as soon as possible. It is a lot to process and they need to go through all their feelings. Kids who are moving are worried about making new friends and losing old ones. Telling your children when you are moving may be too abstract for them. Encourage them to create a countdown calendar and have them cross off each day so they have a visual that will help them see when you are moving.
Visit Your New Home – If at all possible, take kids to visit your new home. Take a walk around your new neighborhood to be and check out their new school. It will help them see where they will play, eat, sleep, and live. If you aren’t able to go into your new home, see if you can have a video or photos to share with your children. Zillow is great for this purpose. Very often homes on Zillow have interior photos as well as exterior ones. You can also take pictures during your home inspection.
Contact Your New – and Old – Schools – If you will be moving out of your school district, request a copy of your child’s academic records. Tell the school district that you will be moving and ask if you need to sign any release paperwork for them to transfer any additional records to the new school. Contact the new school district and ask what paperwork they will need to enroll your child. Don’t wait until school is about to begin to contact the new school. Make sure you have easy access to copies of their birth certificates, report cards, immunization records and any other paperwork that will be required. Call the school to see if you can take a tour of the school with your children so they are somewhat familiar with how the school is laid out.
Have Kids “Design” Their New Room – You will want to get your children excited about the move and one way to do this is to have them involved in planning their new bedroom. If you are going to paint their room, ask them what color they would like for their walls. Are there any important action figures or sports idols that they would like to have a poster or two of to hang on their wall? What about furniture? Is it time to upgrade their bed or dressers? Or maybe just changing their comforter and adding some pillows or other decorations will get them super charged for their new space.
Share a Story – When there is a big change about to occur, reading a book about it may ease any fears. They can read about how the characters in the book handle the move and ask you questions. Look for books about the new area if you are moving to a new state or country. What are some fun things to do in that area? Plan to do some of those activities when you arrive. Amazon offers several great kid’s books on moving.
Share the Packing – Before you start packing, take photos of your existing home. This will allow your children to look back on their bedroom and home and remember it when they are feeling sad. Depending on the age of your child, you may want to have them help you. It’s a great life lesson on how to pack and get organized for a move. You may ask them to make the labels for the boxes, so they are feeling a part of the team. Or have them draw on the boxes.
Unpack the Kids First – The first rooms that you need to unpack are your children’s. You will want them to sleep in their own bed and wake up with their clothes unpacked and familiar items around them in their rooms if at all possible. If it isn’t possible that first move in day, by all means, make it a priority to do the very next day. They need to feel settled.
Moving is stressful no matter what age you are, but it can be especially stressful for kids. Making new friends and getting to know a new school and a new neighborhood are tough for young children and teens. By planning ahead and involving your children, regardless of age, in the moving process, you can make them feel more comfortable, and possibly even excited, about this change.
July 4this THE day for fireworks, outdoor barbeques, beach parties, and, after the fireworks, bonfires. All of that exposure to heat, sun, and sparks can result in some serious burns if you’re not careful. The US Consumer Product Safety Commission Fireworks Information Centerreports that approximately 200 people are treated at emergency rooms around July 4th. Avoid the burn by following a few common sense Independence Day – and every day – safety tips.
Wear Sunscreen – Even on a cloudy day, the sun’s UV rays can cause sunburns. Make sure to apply a water-resistant sunscreen with an SPF of 30 or greater 15 minutes before going outdoors and to liberally reapply throughout the day. If you are swimming, sweating, or getting wet in a balloon toss, make sure to reapply. Don’t forget to apply sunscreen protection to these often-forgotten areas: ears, bottom of feet if laying out in the sun, lips, and if you have skin exposed on your head. Neutrogena’s Wet Skin Kids Sunscreen Sprayis great for adults too.
Save Your Eyes, Ears, and Neck – If you are going to a live outdoor firework display, bring earplugs and comfortable, reclining lawn chairs for yourself and your children. Sit close enough so that you can see the display, but far enough back that you aren’t exposed to the blinding light or sound from each launch. The light can potentially damage eyes. Fireworks noise can scare small children and damage hearing. Straining your neck backwards to see a fireworks display can place stress on your spine.
Leave The Fireworks to a Professional – Lots of safety tips for this category! Leave the firework display to a trained professional. Don’t bring fireworks into your state if it is illegal. Never leave children alone with sparklers. Even if you think the sparklers are out, dip them in water to ensure they are. Fireworks are beautiful to view. Not so much fun if you are attempting to create your own. So many things can go wrong. For more information, check out the National Fire Protection Association’s (NFPA) fireworks safety page, including their fun, informational video.
Establish a Safety Perimeter – Honestly, there is nothing better than having any kind of food grilled. If you are grilling and have children in the area, please establish a parameter around the grill that children are not allowed. Even after a grill has been turned off, the coals and grill can remain hot for a while. To be extra safe, it is not a bad idea to have a fire extinguisher nearby. These same rules apply for fire pits. Never leave a child unattended while toasting marshmallows as they can easily trip and fall near the fire.
Stock Up on Ice – In the summer, ice is great to have around to keep our beverages cold. Ice can also come in handy as a first-aid tool. If someone sprains a body part or if someone burns themselves, ice will be a great go to item to help triage the injury.
Designate a Driver – It stands to reason that just like any other day, do not get behind the wheel of a car if you are not sober. July 4thhas the most road fatalities. If you have been drinking, have someone else drive. Even if you are sober, be alert of your surroundings and make sure everyone is using a seat belt and that your child seat is properly installed.
Enjoy the celebrations this 4thof July. It is a great day to celebrate not only with friends and family but to celebrate the independence of our country. This year marks the 243th anniversary of the publication of the Declaration of Independence of the USA from Great Britain.
 Join My Email List